Wednesday, February 25, 2015

How To: Alter a Dress

I just love a good refashion. I found this dress for $1 at a thrift store and even though it was ridiculous with its enormous sleeves, neck tie and shoulder pads, I liked the fabric and thought it would be a good project.


Here's what I did:

1. Remove the shoulder pads. Always the first step when taking the ugly out of old dresses.

2. Rip out the seams along the shoulders and sleeves, removing the neck ties and the sleeves completely.


3. Re-sew the shoulders, following the original seams lines.


4. Take the dress in on the sides to make the arm holes smaller and the dress more fitted. I wanted the dress to be more of a shift style, so I only took in the sides about 6" down from the arm holes. If you want a more fitted dress, you would take it in all the way down to the hem.


5. Reshape the arm holes. I used a dress that fits well to see how much to trim from the arm holes. This was probably one of the more difficult steps, but you can see in the picture above the chalk line around the arm hole, that is where I cut to make the hole smaller.

6. Take in sleeves. The sleeves on this dress were enormous and the cuffs were very tight fitting around my wrists so I knew I would have to do a lot of work to make them look normal.  Again using a finished dress for reference I determined the new length for my sleeves and cut the bottom 5" off each sleeve, then took each sleeve in another 4" (2" from each side of fabric, where the pins are).


7. Make the cuffs. I used the fabric I cut off of the bottom of each sleeve to make the cuffs. After determining how big I wanted them, I cut them to size and then ironed on a very lightweight interfacing to the wrong side of the fabric to give the cuffs some shape. I then sewed them into a circle, with right sides together, pressed the seam open and then folded down each raw edge about 1/2".


8. Attach cuffs to sleeves. First I basted along the bottom edge of the sleeve, then pulled the basting stitch gently to pucker the sleeve. Only pucker the sleeve enough to make the opening the same size as the cuff (you want a slight pucker, but don't want to go back to what the dress looked like originally). Next, I pinned the open cuff to the inside of the sleeve (the sleeve is right side out for this step), sewed it on, then folded the cuff over and topstitched.


9. Attach the sleeves. Sewing on sleeves is always a little hard hard for me, but especially when I am doing alterations because my sleeve and my arm hole often end up not matching as well as they would from a pattern. Getting the sleeves on took a little bit of time because I had to do several adjustments as I went. It's always a good idea to use a basting stitch first when attaching your sleeves and then go over it with a regular stitch once the sleeve is in place and has no puckers. Rather than give you my step-by-step here, I'll share the best tutorial I have ever seen on attaching sleeves: Teach Yourself to Sew: How to Sew A Sleeve

10. Make sash. I used the remnants of the neck tie to make a sash for my waist. First, turn the neck ties wrong side out. Following the straight seam on each half of the neck tie, I continued sewing to the end of the fabric and then cut off the excess. Then I turned each strip right side out and ironed them flat. I folded the end of one strip inside itself, then tucked the raw edge of the other strip into it and topstitched it in place.


11. The picture doesn't show it, but a good tip to make projects look professional is to always give them a good iron when they are done. And, you're finished!


Friday, February 6, 2015

Resolution Review: January

Now that January is already over(!) I thought I would review my goals for 2015 and write about what I want to continue to do or change in February.

More detailed information about each of goals can be read here. Now to review my progress (get ready, it's a little long):

Exercise at least once a week. This was a big fail. I did "8-minute abs" one time and that is it! I just never felt motivated in the evening to go to the gym. I was usually tired after a long day with Luke and felt like I would much rather be home hanging out with Phil. I could have done some more ab workouts I guess, but I usually just forgot.
Working out is hard for me. It has always been hard for me to stay motivated on my own. If I had a friend to go with me I know I would be much better, but its hard to find someone else who wants to do the same things and has the same schedule. The only time I feel like I was really dedicated was after Luke was born and I wanted to lose the baby weight. I walked every day and did ab and weight training every night and I loved it. But, after we moved to Utah, I got out of my routine, and then the weather starting cooling down, and now I never work out at all. I know I should, but its hard to find the time with the little guy.
With all that being said, I have decided to try to adjust/add to my goal and instead of focusing on traditional work outs, which I never maintain, I am going to try to walk more again because that is something that I actually enjoy and can do during the day with Luke instead of having to try to find time to go to the gym. That works out well because I am adding another goal to my list which is to drive less (see below).

Eat less sugar. This is a goal that I thought I would really struggle with from the start, but has actually gone much better than I expected. My plan was to slowly cut back on sugar by skipping sweets for two days a week, then up to three, then four, then five. Knowing that I wasn't cutting sugar out completely I think really helped. I chose to skip sugar on Tuesdays and Thursdays and I was able to stick to it without too much trouble. I did have cravings some nights, but just reminded myself, "I can have a sweet tomorrow" and then was able to forget about it. February will still be two days of no sweets and then in March I will go to three.

Eat more fruits and vegetables. First of all, thank goodness Sprouts moved in just down the street from us because that has really helped me to stick to this goal. I am the worst at eating enough fruit and veggies, and even though I cook dinner every night, I often forget a side dish. I was determined to be better so I started buying salad every week as well as all kinds of fruit and vegetables that I could snack on during the day.
I don't like eating salad. It's not that I don't like the taste, but I don't like how much work it is to add other veggies to it, and then to try to get those darn leaves on your fork. But, it really was the easiest way to get a serving of vegetables every night with dinner, plus Phil loves salad. And, surprisingly, after several weeks of eating it almost every night, I am starting to like it too.

Keep a one sentence journal. Fail. Big fail. I wrote in my journal one time. I'm not sure what I need to do to make this happen. I still want to do it, but I forgot a lot, and when I did remember I was kind of just too lazy to actually do it. I'll try again this month.

Write a novel in 30 days. Since this is just a one month goal, and I haven't chosen my month to accomplish it yet, I can't say much about it, except that I am still excited to make it happen, and still determining which month will be best. (I'm leaning toward March or June right now).

Drive less. As noted above, this is a new goal that I added in the middle of January. When Luke was smaller I used to divide up my errands and do one or two of them each day of the week, just to give me a reason to get out of the house. I didn't always like driving somewhere everyday, but it helped me from feeling crazy being inside with a baby all day long. Now that Luke is bigger, he can play more and doesn't need the same kind of attention (although he still needs a lot). He loves to go for walks, and go to the playground, and go to story time at the library.  I have decided to stop driving as much and to walk instead (if its reasonably possible to do so) so that Luke can enjoy some time outside and I can get a little exercise. The weather has been extremely nice for January in Utah and so we have been able to walk and play outside a lot more than I expected we would this time of year.
Not driving as much has also helped me to avoid impulse buys, save money on gas, and stop wasting time at stores that I don't really need to be at. I can spend more time doing things at home (like sewing!) and enjoying the times I do go out more.

Thursday, February 5, 2015

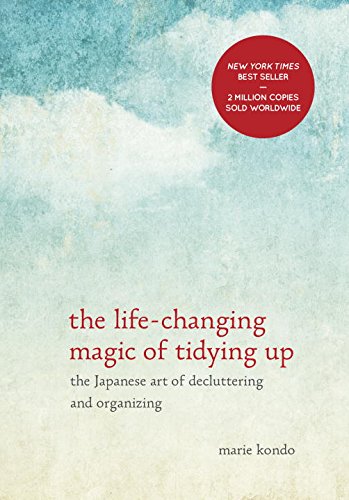
Recommended Reading: The Life-changing Magic of Tidying Up

I have been reading a lot of books lately about organizing, simplifying and minimal living. I don't read them because I feel like we really "need" them, Phil and I are both pretty neat, organized people and we never hang on to much clutter. But, I still really enjoy them (I guess that's the nerd in me). I enjoy getting new ideas. I enjoy the new perspective that living with less gives me.

I recently read The Life-Changing Magic of Tidying Up by Marie Kondo and I loved it. Most of the organizational books I have read all pretty much say the same thing. They tell you when you should get rid of your stuff (when you haven't used it for a year, when it breaks, when you no longer have a place for it, etc...), how you should get rid of your stuff (work on one room at a time, get rid of one thing each day, etc.), and then how to store the things you keep. I like to clean and I like to get rid of stuff. We get rid of stuff all the time (I take a bag to the thrift store every couple of months at least). But none of the books I have read have taken the approach that Marie Kondo does in this book.


She only has one rule when it comes to when to get rid of stuff: get rid of everything that does not bring you joy. And she has one rule for how to get rid of stuff: all at once.

Obviously, some things you just need to have, whether they really bring you joy or not, like toothpaste and toilet paper and wash cloths. But really, when you think about it, most things do require some thought and choice on your part and you should choose the things that you love and make your house feel like home and then get rid of the things that you don't love and that don't bring you joy. This perspective may seem trite, but actually it really works. We hold on to so many things for all the wrong reasons: "maybe I will need it one day, it still works just fine, I spent so much money on it, it was a gift, etc." Even if all of those reasons are true, if you don't love the item, why are you keeping it?

Her second rule, that you tidy your whole house in one go also makes a lot of sense. She doesn't imply that you should actually do it all in one day (unless you actually can do that) but that you continue to work on tidying, in the order she suggests, until you are done (maybe over the course of a week, month or even several months if necessary). If you stop in the middle of the process, or do things out of order, there is a greater chance that you won't finish, or that you will rebound to your old ways and start collecting clutter again.

I think one of the things I loved best about this book was that it takes the focus off of discarding and instead emphasizes enjoying the things you have. I have often focused too much on getting rid of things to make our space neat and tidy, only to find that I have to get rid of things again before much time has passed at all. Instead, if you focus on the things you love, and why you love them, you stop buying unnecessary objects and later don't have so many things to discard. It has really made me appreciate my belongings more, and even given me a new outlook on the things that I have gotten rid of. Rather than feeling guilty about discarding something that I didn't use that much, I can still appreciate it for helping me to know better what I do and don't like, and then I can move on.

Also, my sock drawer. Kondo talks about socks in some detail and at first I thought it was ridiculous. I have always rolled and folded my socks in the same way everyone does (fold the elastic band of one sock over both socks to have a little bundle) and couldn't believe that it really mattered. But, I was curious enough to try out the way she recommends and I cannot believe how happy it makes me. not only do all of my socks now fit in a drawer half the size of the one they were in previously, but I can see all of them at once instead of having to dig around to find the pair I want. I was so excited by the outcome that I did the same things with Phil's socks, and he loves it too. This new way will definitely keep me from over-buying in the future.


I didn't take a before picture of my sock drawer, but I got one of Phil's which pretty much looked the same as mine did before I organized it: 

And this is after I added some magic, plus fit all the socks in a smaller drawer. My drawer looks pretty similar, except that I have lots of tights and peds along with my socks. 


Have you read this book? What did you think about it?

Tuesday, February 3, 2015

Money Wise: The Budget

Note: I originally wrote this and other posts about our finances on a personal blog but have decided to share them here. The original date the post was published is shown below.  


5/11/14


People don't usually like the word "budget". Usually it has a negative connotation of some sort, kind of like "diet". But having a budget doesn't have to be a negative thing. In fact, when you really figure one out, its sort of freeing.

We started using an online budget tool called mint.com shortly after we were married and continue to use it today. You create an account that you then can link  all other financial accounts to so you can see everything in one place. We see our checking and savings accounts, Roth IRAs, HSA, and student loan accounts. You can also create a budget each month so you can view it regularly and easily keep track of where your money is going. Mint will list all of your transactions and then you can assign them to different categories so that they fall within your budget.  It has been a great tool for us. 

That all being said, it has taken time to really learn how to create a proper budget. For a long time I had budget categories, but I mostly just looked at where I had spent money after it had already been spent, rather than telling our money how it would be spent beforehand. That is the key. You have to start each budget before the month has started, determine how much your income will be, and then assign every dollar to a category. It can be hard at first, sometimes you have expenses you don't expect, but after a few months you start to get a pretty good idea of how much you will spend and what you will spend it on. 

Some people may feel that planning how much you can spend on each category (ie: clothing, eating out, groceries, etc.) will be limiting, but as we have started to efficiently budget I find that I feel a lot less guilty. For example, when we didn't plan ahead how much to set for clothing that month I would buy things but then always feel guilty for spending the money, even if it was something I needed. Now I know exactly how much we have agreed to spend so as long as I stay within that amount I don't feel guilty at all. 

Creating an efficient budget (together! If you're married) is really the first step to taking control of your money. Once you start that, your debt-free future starts to become a little clearer. 
Related Posts Plugin for WordPress, Blogger...